HOME ABOUT REVIEWS INTERVIEWS SUBSCRIBE CONTACT FACEBOOK TWITTER

Spicy Turkey and 3 Bean Chili

Spicy Turkey and 3 Bean ChiliI currently live in Cincinnati, Ohio - the chili capital of the World. Chili is so popular here that it seems like there are chili restaurants on every street corner.

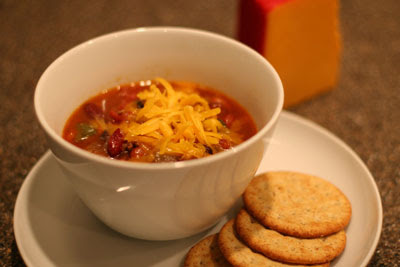
Brought to the city by Greek immigrants, Cincinnati style chili is usually served over spaghetti noodles with beans, onions, cheddar cheese and oyster crackers at famous local establishments like Skyline Chili, Gold Star Chili, and Camp Washington Chili to name just a few. The sauce is sweet, flavored by cocoa or cinnamon.

This recipe is a more traditional version of this dish that I learned over 20 years ago. Since then, my friend Jennifer has upgraded it with healthier ingredients and added a Southwest flavor with cilantro and jalapeno peppers.

Ingredients:
1 tbsp olive oil
1 lb. ground turkey
1 cup diced onion
3/4 cup diced green pepper
1/2 cup diced celery
2 garlic cloves, minced
3 cups chicken broth
1 15 oz. can diced tomatoes with juices
1 15 oz. can black beans drained and rinsed
1 15 oz. can great northern beans
1 15 oz. can dark red kidney beans
1 4 oz. can chopped mild green chilies
2 tbsp chili powder
2 tspn ground cumin
4 tspn minced, seeded jalapeno chilies
1/2 cup chopped fresh cilantro
salt & pepper to taste

Preparation:
  1. Brown turkey meat and add to large pot
  2. Heat olive oil and saute veggies until softened add to pot.
  3. Add remaining ingredients.
  4. Bring to a boil and then simmer for at least one hour.
  5. Add cilantro prior to serving.
  6. Garnish with cheese, sour cream, and avocados.
Related Posts:
Arrogant Bastard Chili
USA Flag United States Ohio Flag Ohio

Neapolitan Pizza Dough

Neapolitan Pizza Dough
If you decide to master one recipe posted on this blog, this one for Neapolitan pizza dough would be a good choice. If you can make this dough, you can construct hundreds of different combinations of delicious thin crust pizzas. It's so easy and affordable, you'll never order out for pizza again!! Here are the details on how to make Neapolitan pizza dough.

Recommended Equipment:
Mixer (I use the standard Kitchen Aid mixer)
Pizza stone
Pizza stone
wooden pizza peel
wooden pizza peel
metal pizza peel
metal pizza peel

Ingredients:
4 and 1/2 cups of all-purpose flour
1 and 3/4 tspn salt
2 tspn instant yeast
1/4 cup extra virgin olive oil
1 and 3/4 cup cold water
cornmeal (for dusting pizza stone and wooden peel)

Preparation:
  1. Add the flour, salt, and yeast to a large mixing bowl.
  2. Using a mixer with hook attachment, mix the dry ingredients together and then slowly mix in the olive oil and then the water.
  3. After ingredients have combined and dough pulls from the side of the mixing bowl, turn the dough out onto a counter top that has been dusted with flour.
  4. Work the dough for about 5 minutes.
    Work the dough
  5. Divide dough into 6 equal parts.
    Divide dough into equal parts
  6. Roll each piece into a round ball and place inside a plastic freezer bag.
    place dough inside a plastic freezer bag
  7. After all of the pieces have been placed inside the bag, seal it and refrigerate it over night.
  8. The next day, place pizza stone on an upper rack in the oven and dust it with cornmeal.
  9. Preheat oven to 450 degrees Fahrenheit.
  10. Dust the wooden pizza peal with cornmeal.
  11. Take one of the balls of dough that you prepared the day before and place it on a counter top that has been dusted with four.
  12. Use your palm to flatten the ball, the pull the edges outward as you turn the circle of dough in your hands. Eventually the circle of dough will become thinner and will expand to about 8 to 10 inches in diameter.
    form a circle of dough
  13. Place the Neapolitan pizza dough onto the wooden peal and top it with whatever topping you like. (The pizza pictured in this post is topped with tomato sauce, fresh basil leaves, oregano, scamorza cheese, Parmesan cheese, and pepperoni). Also, be sure to brush the crust with a thin coating of olive oil.
    top the pizza with cheese
    add other toppings
  14. Slide the pizza onto the pizza stone and bake for 10 minutes.
  15. Using the metal pizza peal, slide the pizza off of the pizza stone.
  16. Slice pizza and serve.
Note: If you don't want to use all of the dough all at once, you can freeze it for up to a month.
Italian FlagItaly

Pastéis Recipe

Pastéis
These half-moon shaped pastries are popular throughout Brazil and were originally brought to Sâo Paulo by Japanese immigrants. Pastéis are great for parties and informal gatherings and can be made with a wide variety of basic ingredients that you have on hand.

Ingredients:
2 cups all purpose flour
2 tbsp canola oil
1 tbsp white vinegar
1 8oz. package of cream cheese
1 cup mozzarella cheese
1 tbsp cachaça (or white rum)
1 cup water
1 tspn salt
1 egg

Preparation:
  1. Mix flour and salt together in a mixing bowl of an electric mixer.
  2. In a separate bowl, mix canola oil, cachaça, and vinegar.
  3. Slowly add the mixture from step #2 to the flour and salt mixture.
  4. Slowly add water little by little as you mix all of the ingredients together.
  5. Work the dough and let rest for at least 2 hours.
  6. Take a small handful of the dough and roll it out with a rolling pin on a lightly floured surface. Roll dough until it is thin.
    Roll dough
  7. Use a bowl or round cookie cutter that is about 4 inches across to cut circles from the sheet of dough.
    cut circles from the sheet of dough
  8. Assemble filling. For this recipe, use about 1 to 2 tablespoons of mozzarella cheese and a small slice of cream cheese per pastéis. You can experiment with a variety of other ingredients as well.
  9. Add the filling of your choice to the center of the circular piece of dough.
    Add the filling
  10. Fold the piece of dough into a half-moon and pinch the edges together using your fingers or a fork.
    Fold the piece of dough into a half-moon
  11. Repeat steps 6 through 10 until all of the dough has been used.
  12. Deep fry the pastéis in a deep fryer, 3 to 4 at a time until golden brown. Optional: baste the pastéis with a light coat of egg yolk before frying them to give them a richer, complex color and added flavor.
Brazilian Flag Brasil

Ropa Vieja Recipe

Ropa ViejaRopaVieja literally means "old clothes" in Spanish and refers to the way that the beef shreds after being slow cooked in the mildly acidic sauce for several hours. The flank steak falls apart when you remove it from the slow cooker and the remaining sauce has a complex, slightly spicy, smokey flavor. You can serve this with tortillas or over rice along with diced tomatoes, Oaxaca or cheddar cheese, and sour cream.

RopasThe first time that we tried Ropa Vieja was at a Cuban Restaurant called Cuba Libre which is located in central London's Islington neighborhood. If you're ever visiting London or if you happen to have a long layover at Heathrow caused by a volcanic eruption in a
distant land, you should visit Cuba Libre. It's a pretty lively place on most nights, with a serious selection of unique drinks and great food.

Recommended Equipment:
slow cooker

Ingredients:
1 tbsp canola oil
2 pounds of beef flank steak
1 cup beef broth
1 8oz. can of tomato sauce
1 6oz. can of tomato paste
1 medium yellow onion, diced
1 green pepper, sliced into strips
4 cloves garlic
1 tspn ground cumin
1 tbsp fresh cilantro, chopped
1 tbsp olive oil
1 tbsp white vinegar

Preparation:
  1. Heat canola oil in a skillet over medium-high heat.
  2. Brown flank steak on each side, about 3 minutes each side.
  3. Transfer beef to a slow cooker.
  4. In a separate bowl, mix the beef broth, tomato sauce, onion, bell pepper, garlic, tomato paste, cumin, cilantro, olive oil, and vinegar.
  5. Add this mixture to the slow cooker.
  6. Cook on low for 10 hours or on high for 4 hours.
  7. Shred the meat and serve with tortillas.
Need a wine to go with the Ropa Vieja? Try this one: Martellotto Paso Robles Cabernet Sauvignon

Cuban Flag Cuba [ print this recipe for Ropa Vieja ]

Margarita Recipe

Margarita
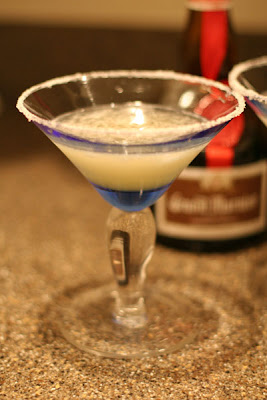
This one comes from my friend Paul in Texas. If you like margaritas, you have to give these a try and if you don't you should still give them a try because they're nothing like the ones that you get when you order a margarita in a restaurant.

When you taste one of these margaritas, you will understand that they were made the old way, by hand, no prefabricated mixes that you find in a 7-11 convenient store. This is the real deal. This is how margaritas were made a hundred years ago. Perhaps Pancho Villa had a pitcher of these when he decided to declare war on the United States. I don't know but I think that when you try them, you will think that perhaps you've finally found Eldorado. I've said it before and I'll say it again, "I don't always drink Margaritas, but when I do they are made this way..." Enjoy responsibly.

Pancho Villa

The following recipe makes 2 to 3 margaritas.

Ingredients:
3 shots of Sauza Conmemorativo tequila
3 shots of Gran Marnier
3 shots of lime juice, fresh squeezed
3 heaping tbsp sugar
crushed ice

Preparation:
  1. In a shaker, add all of the ingredients except the crushed ice.
  2. Stir to dissolve the sugar.
  3. Fill shaker with crushed ice.
  4. Shake until your arm hurts.
  5. If you want salt on the rim of the margarita glass, use a lime wedge to wet the rim.
  6. Pour margarita into glasses and serve.
Related Articles / Posts:
Six Tequilas That Are Too Good For a Margarita

Mexican FlagMexico

Loukoumades Recipe (λουκουμάδες)

Loukoumades (λουκουμάδες)
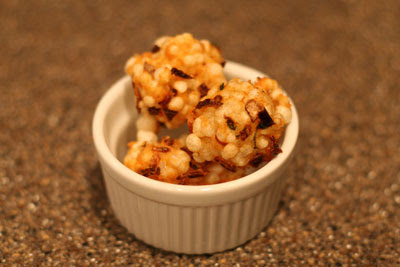
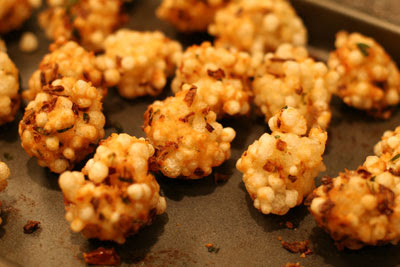
If you like donuts, you should try this classic Greek dessert. It seems every country has a version of this dish. Here in the US, we have Munchkins from Dunkin' Donuts, the French have begneits, the Brazilians have sonhos, and the Greeks have loukoumades.

I first tried loukoumades at Artopolis Bakery in Chicago's Greek Town and I must admit they are my favorite of all of the donut varietals. They are light and just sweet enough to want another! If you're ever in the Windy City, you should pick up some loukoumades at Artopolis. If not, you can try to make them yourself. It's pretty easy.

Recommended Equipment:
deep fryer
mixer

Ingredients:
Dough:
1 cup warm water
1/2 cup milk
1 package of dry yeast
2 cups of all-purpose flour
1/2 tbsp sugar
1/4 tspn salt
1 tbsp olive oil
oil for frying

Topping:
1/2 cup of honey
1 tab of butter
confection sugar
cinnamon
sesame seeds (optional)
walnuts, ground (optional)

Preparation:
  1. Dissolve the yeast in the warm water.
  2. Combine the yeast and water mixture with the milk, flour, sugar, salt, and olive oil in a mixing bowl.
  3. Mix until batter is smooth.
  4. Cover bowl with a dish towel and let sit in a warm place for 2 hours.
  5. Heat oil for frying.
  6. Using a deep spoon (I used a table spoon measure), place spoon first in the hot oil, then scoop a spoonful of the batter into the oil. Do this each time to prevent the batter from sticking to the spoon. The loukoumades should be oval shaped.
  7. Add enough of the loukoumades to the fryer to almost cover the surface of the oil.
  8. Remove when golden brown.
  9. Let dry on a paper towel then put them on a platter.
  10. In a separate pan, add the honey and pad of butter. Heat pan on medium-low until honey flows freely.
  11. Drizzle honey over loukoumades and then sprinkle with confection sugar, and cinnamon. You can also top this with sesame seeds and ground walnuts if you prefer.

Greek Flag Greece [ print this recipe ]

Olio Verde

Olio Verde
Olio Verde is a simple Italian appetizer that you can prepare in 5 minutes. Serve it with pieces of warm Italian or French bread.

Ingredients:
3 cloves garlic, diced
4 tbsp extra virgin olive oil
1 tspn red pepper flakes
4 sprigs of parsley, finely chopped
3 fresh basil leaves, finely chopped
3 tspn sugar
2 tbsp balsamic vinegar
1 loaf of Italian or French bread

Preparation:
  1. Heat olive oil in a pan over medium heat.
  2. Add garlic and heat it in the oil for about 5 minutes.
  3. Add parsley, basil and red pepper flakes and stir.
  4. Reduce heat to low.
  5. Add balsamic vinegar and stir.
  6. Add sugar and stir the mixture until all of the sugar is dissolved.
  7. Serve with warm, sliced Italian or French bread.
Italian Flag Italy

Chicago Style Hot dog

Chicago Style Hot dog
If a veggie burger is not your style and the grill is still hot, try this Midwest classic. A Chicago Style hot dog has to include all of the ingredients below and only those ingredients listed here....so no ketchup!! The bun should be steamed however, I toasted this one and it tasted pretty close to what you'd find at any hot dog stand in the Windy City. By the way, my favorite is the Wiener Circle at 2622 North Clark, Chicago, Illinois for the food and dining experience.

Ingredients:
  • poppy seed hot dog bun, steamed or toasted
  • mustard, yellow
  • onion, diced
  • sweet pickle relish (dyed green) - this is called nuclear relish
  • dill pickle spear
  • tomato slices
  • pickled sport peppers
  • celery salt

Vienna Beef Hot Dogs
Preparation:
  1. Allow coals of the grill to get really hot.
  2. Toast hot dog buns on grill for about 3 to 5 minutes.
  3. Arrange hot dogs on grill around the hottest spot.
  4. After about 5 minutes, turn the dogs.
  5. Remove from grill and garnish the dogs like the one in the photo.
  6. Serve hot.
Related Recipes:
Garden Burger

USA Flag United States Chicago Flag Chicago

Garden Burger

Garden Burger
The weather here in the Midwest is finally getting hospitable so my wife and I decided to dust off the Weber and do some grilling. We made garden burgers similar to those served at Squirrel's Tavern in Corvallis, Oregon.

The garden burger is a pretty simple burger to make and a healthy choice with no sacrifice in flavor. Give it a try this Spring.

Squirrels Tavern

Ingredients:
4 meatless burger patties (I used Boca brand)
4 kaiser hamburger buns
sprouts
1 tomato, sliced
1 white onion
ranch dressing
4 slices of cheddar, American, or Monterrey jack cheese (optional)

Boca Burgers

Preparation:
  1. Allow coals of the grill to get really hot.
  2. Toast hamburger buns on grill for about 5 minutes.
  3. Arrange patties on grill around the hottest spot.
  4. After about 5 minutes, flip patties. If you are using cheese, put a slice on each patty. Grill for about 5 minutes more.
  5. Stack burger in this order: bun, burger, sprouts, tomato, onion, ranch dressing, bun.
  6. Serve hot.
Related Recipes:
Chicago Style Hot dog

USA Flag United States Oregon Flag Oregon

Sago Pagoda

Sago Pagoda
This is an appetizer that my mother-in-law taught me how to make. It's light, a little spicy, and full of flavor. I can literally eat 20 of them with a cold beer.

In order to make them, you will have to seek out an Indian or Pakistani grocery in your area in order to find the main ingredient, tapioca puffs or also called sago (see photo below).

tapioca puffs or sago

Ingredients:
2 cups all-purpose flour.
2 tbsp rice flour.
2 cups sago (tapioca puffs)
2 cups buttermilk
7 curry leaves, diced
1 tspn ginger
2 tspn red pepper flakes
1 tspn salt
1 handful of cilantro, diced
3 cloves of garlic, diced
3 green onions, diced
1 yellow onion, diced

Preparation:
  1. Add 2 cups of tapioca to a glass pyrex measuring cup.
  2. Add buttermilk to pyrex measuring cup to a level just above the tapioca.
  3. Allow tapioca to absorb butter milk. This will take about 2 hours.
  4. Pour tapioca into a large mixing bowl and add all-purpose flour and rice flour to absorb any excess moisture.
  5. Mix remaining ingredients with tapioca.
    Mix remaining ingredients with tapioca
  6. Make small balls from mixture using a tablespoon measure and drop into oil of a deep fryer.
    drop into oil of a deep fryer
  7. Remove when pagodas are tan in color and let cool on a baking sheet covered with paper towels.
    place on baking sheet
Indian Flag India

Saimin

SaiminSaimin is one of the most popular dishes in Hawaii. In fact, you can even find Saimin on the menu at most McDonald's there. It features noodles very similar to Chinese mein, Philippine pancit, and Japanese udon.

Saimin can be traced all the way back to Hawaii's plantation era. During the early 20th century, laborers from China, the Philippines, Portugal, Hawaii, Korea, and Japan worked side by side on Hawaii's many pineapple and sugar cane plantations. These laborers worked together and ate together too and as a result, new culinary combinations evolved. Saimin is one such creation. It features thin wheat egg noodles borrowed from Chinese and Japanese tradition. It also features cabbage popular in Korea as well as pork which is often found in Portuguese cuisine. Saimin is a versatile, easy dish to prepare that works with a wide range of ingredients.

Udon Noodles
Udon Noodles

Ingredients:
1 package of Udon Japanese Noodles
4 cups of chicken broth
1/2 inch piece diced fresh ginger
2 tbsp soy sauce
1 tspn garlic powder
1 tspn salt
1 tspn pepper
1/2 pound pork tenderloin, thinly sliced
1/2 carrot, thinly sliced lengthwise
1/2 to 3/4 cup shredded cabbage
3 green onion, diced
3 to 4 dried shiitake mushrooms, diced

Preparation:
  1. Cut pork tenderloin into thin slices and put them in a bowl with the salt, pepper, and garlic powder. Mix the ingredients together so that the surface of the slices is well coated.
  2. Refrigerate pork slices for a half an hour.
  3. Brown pork slices in an oiled skillet over medium heat. Then remove from heat.
  4. Add chicken broth and ginger to a large pot and heat at medium high.
  5. Bring just to a boil and then reduce heat to low.
  6. Add soy sauce and pork slices.
  7. Add the carrot, cabbage, green onion, and mushrooms.
  8. Simmer for 10 minutes or until the vegetables are cooked to the degree that you like.
  9. Remove from heat.
  10. Heat udon noodles in a microwave for 15 seconds in a soup bowl.
  11. Spoon broth, pork, and vegetable mixture over the noodles and serve.
Related Articles / Posts:
Benefits of soup

USA Flag United States Hawaiian Flag Hawaii

Sogliole al Basilico e ai Pinoli (Sole with Basil and Pine Nuts)

Sogliole al Basilico e ai Pinoli (Sole with Basil and Pine Nuts)
This one comes to us all the the way from Montova, Italy from my friend Anne.

She said she loves Sogliole al Basilico e ai Pinoli because it is so simple and totally relies on the freshness of the ingredients. You may use either lemon sole or Dover sole, and you can use a whole sole or just fillets. The important things are fresh fish, high quality olive oil, and fresh basil.

When I tried to make Sogliole al Basilico e ai Pinoli last weekend, I was not able to find any fresh fillets of sole so I used fresh flounder fillets instead and it turned out great.

This recipe comes from the town of Caorle, east of Venice, and well known for its high quality fish and sea food.

Ingredients:
4 sole, about 300 gr or 10 oz. each
1 tbsp extra virgin olive oil
4 tbsp pine nuts, coarsely chopped
5-6 basil leaves

Ingredients for marinade:
4 tbsp olive oil
3 tbsp lemon juice
1 tbsp chopped fresh basil
coarse sea salt and fresh ground pepper

Preparation:
  1. Have sole gutted with the head and the fins removed and skinned by your fish monger, or just use fillets. wash the fish, dry, and place on a dish.
  2. Prepare the marinade. put the olive oil in a bowl, beat in the lemon juice until emulsified, then the basil, salt and pepper. spoon the marinade over the sole and leave to marinate in fridge for an hour.
  3. Preheat oven to 200 celsius, 400 farenheit.
  4. Lift the sole out of marinade. grease a shallow large baking dish with olive oil and lay fish in it. place the dish in the preheated oven and cook for about 10 minutes for whole fish, 7 for fillets.
  5. Meanwhile, heat the marinade and add the pine nuts. when the liquid gets to boiling point, pour it over sole and leave to cook a couple more minutes (no more than 2 for fillets, 5 for whole fish).
Note:
  • If you don't like the idea of using the used marinade as a dressing, it is simple to just make a double portion of the marinade and to keep half of it to pour over fish.
  • Also, be careful not to add too much lemon, as it can cut down on the flavor of the olive oil and basil.
Need a wine to go with this? Try this one: Casa-Silva-Sauvignon-Blanc


Italian Flag Italy
Related Posts Plugin for WordPress, Blogger...